
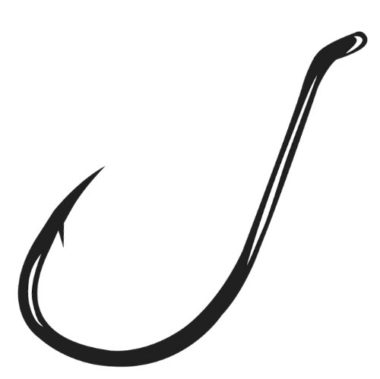
Every fisherman needs to know how to tie several different knots on the hooks. He can then utilize these knots in different fishing situations and will come in handy when reeling in that huge catfish or that bass. One of the most reliable knots is the Snell knot which allows the angler to achieve a straight-line pull.
A fluorocarbon fishing line is ideal when tying the Snell knot but you can also use it on other types of lines.
This is how to Snell a hook, but first…
Why You Want To Snell a Hook
The first and main advantage of Snelling a hook or tying a Snell knot is the strength of the knot itself. If you are going after big fish, then a weak knot could untie itself against the pressure of the fighting fish allowing it to escape.
The Snell knot is one of the strongest knots out there and will allow you to reel in the fish caught in the hook without any trouble.
Besides if you are a fisherman you should be aware of the 10 incredible health benefits of fishing.
The second reason why you want to use the Snell knot is that it increases the chances of landing more fish by making circle hooks more effective. It is much easier to get the hook well set in the mouth of the fish. Keep in mind however that its effectiveness is only possible when the Snell knot is done correctly.
Do it the wrong way and the hooks will actually be less effective. This means trying the knot from the front to the back and not from the back to the front as we will find out later on.
Then there is the ease of tying. The Snell hook is one of the easiest ways to tie a hook. Once you learn how to Snell a hook you can even tie it with your eyes closed.
What to Consider When Using the Snell Knot
Many people who tie the Snell knot for the first time have doubts about whether it will hold the hook securely onto the leader. As experienced anglers will tell you, it is extremely rare for the Snell knot to give up on you.
In case you find that you are experiencing issues with the knot, it is often caused by the leader. If the leader is old, too heavy, or just poor quality then you are likely going to experienced problems regardless of the type of knot that you use. If it’s top-notch, however, you’ll be surprised at how secure the Snell knot is.
To lure the bass to your bait, check out the best fishing scents and attractants for bass.
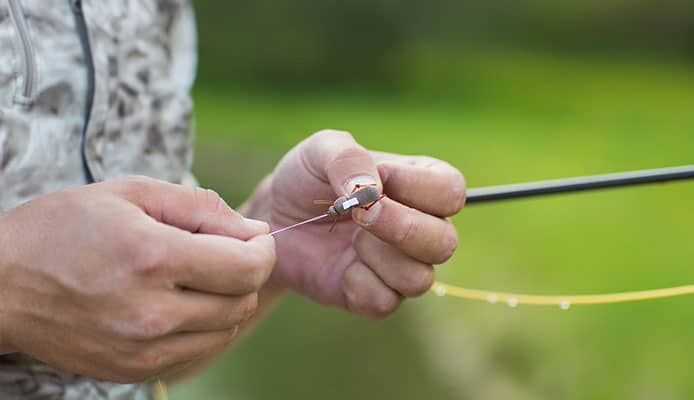
How to Snell a Hook
The first thing that you are going to want to do is to cut a piece of the leader.
Next, take this piece and get it through the hook eye moving from the front to the back and then press down on the shaft.
Then by holding the leader on the hook’s shaft in place, use an anti-clockwise motion to wrap the line around the shaft of the hook seven or eight times while moving towards the hook from the eye.
Now with the loose end of the leader, hold it and pull it from the back to the front through the hook eye.
Lastly, wet the leader and then pull the line tight and you have your Snell knot.
While it might seem challenging at first, you will get the hang of it with a little practice. Don’t forget to carry your fishing tackle box.
Tying a Double Snell Knot
Sometimes you may need to cast a long line with multiple hooks and may be wondering whether it’s possible to use multiple Snell knots and hooks on a long line.
Keep in mind that you may not be permitted in your area to fish with more than two hooks on the same line. Ensure that you understand the fishing regulations in the area where you intend to fish.
If, however, you are permitted to do this, then you should know that it is very much possible to tie a double, triple, or even multiple Snell knots.
Start by sending the line through the eye of the first hook. Note that you will need to let the line run long through this first hook to allow you to tie a second or third hook later.
With an anticlockwise motion, wrap the line around the shaft seven or eight times while holding the line on the back of the hook shaft as the turns move towards the eye.
You can use this knot with a monofilament line if you prefer.
The take the loose end of the line and pull it back while you hold it. Pull from back to front through the hook eye and you will have your first Snell knot hook.
Now it’s time for the second hook. You are going to repeat the same process using the remainder of the line.
Something to always keep in mind is to watch out when working with multiple hooks as you can hurt yourself when tying the Snell knot.
How long a line you will use will depend on the number of hooks that you intend to use. Even if you find that after setting your hooks there is still more line left, do not worry as you can always cut the line that you do not need.
Why the Snell Knot is Important
There was a time long ago when fishing hooks didn’t feature an eye. Instead what they had was a flat part where the eye is situated in modern hooks. The Snell knot was very popular during these times as it so happened to be the only knot that a fisherman could use to tie a line to the hook. What’s more, is it provided a tight and secure hook.
However, this is not to say that such type of hooks is not used today. In fact, you can often find them with fly fishermen. If you are a fly fisherman ensure you use the best fly fishing reels.
When to Avoid Using the Snell Knot
Surprisingly there are instances where you will need to completely avoid using the Snell knot. One of these is when you are targeting toothed fish.
Do you recall how the fishing line or leader is wrapped around the shank of the hook? This means that the line will be much closer to the mouth of the fish.
In case the line of the fish grazes through the teeth and happens to cut through one of the coils then you will lose the fish.
The Different Types of Snell Knots
Snell knots come in four main variations each of which provides a secure hold on the hook and allows you to reel in even the most powerful fighting fish. These are the traditional Snell knot, and the uni-knot Snell knot. There is also the easy Snell knot and the simple Snell knot.
If you are going after bass, it’s important to ensure that you are using the best spinning reels for bass.
Let’s consider these in detail, shall we?
Traditional Snell knot
This is the type of Snell knot that we have covered in this post where you pass the string through the eye from front to back and use the end of the line that goes to the rod to wrap around the shaft of the hook. Let’s now consider the other 3 types below.
The Uni-knot Snell knot
Start by sending the line through the eye of the hook from the front and then make a single loop. Take the line and then pass it around the shaft over the part of the line that is lying parallel to the shaft.
Then pass the line under the hook shaft and through the loop. Do this multiple times. Six or seven times is enough. After this and once you’ve sent the line through the last hook, hold both ends and pull after moistening it. This will ensure a tight grip.
When fishing in rainy weather, you will need to have rain gear for fishing.
With the remaining line on the end of the hook, you may decide to cut it short or you may want to add more hooks.
Simply follow the procedure above when adding more hooks.
You might also like: Which Is The Best Hook Size For Trout Fishing
Easy Snell knot (version 1)
There are two versions of the easy Snell knot. This is the first. Start by passing the fishing line through the eye of the hook and form a loop at the end. Note that if you plan on adding a couple of more hooks then you need to add a sufficient length of the line.
When combining camping with fishing, one of the most important tools to have is a fish fillet knife to help prepare the fish for the pan.
With the line along the shaft of the hook, pinch it around the intersection of the loop. Next wrap the line several times, say six or seven times on the shaft of the hook as well as on the line that is lying on the shaft. Press down the wrapped line with your finger and with the line at the tag end of the loop pass it through the loop.
Pinch down and moisten the line and the knot and then pull on both the line and the tag end of the line.
If you want to add more hooks, simply repeat the process. If not cut the remaining line.
Easy Snell knot (version 2)
This Snell knot is a variation of the first version that we have looked at above. Start by passing a line through the eye of the hook, make a loop, and then pass the line back through the eye of the hook.
Press down on the line resting on the shaft of the hook. With the end that you passed through the eye a second time, take it and wrap it six or seven times over the shaft of the hook and through the loop.
Moisten the knot. This ensures that when you are tightening the knot, you are going to achieve a tight and secure hold. Now pull on the tag and the line simultaneously until you get your desired tight knot.
Note that if you are doing catch and release, a good pair of fishing pliers will help you dislodge the hook from the fish’s mouth.
If you want to add an extra hook, you will use the thread of the line that passed through the hook for a second time. You will pass it through the second hook, make a loop and pass it through the hook again.
A point to note is that always use a long line when you plan on using multiple hooks.
The simple Snell knot
The procedure with the Snell knot even with the different variations is always the same. You want to pass the line through the eye from the front of the hook. However, in this case, you will ensure the line goes past the end of the hook at around 1 to 2 inches.
Use one hand to hold and pinch the line along the bend of the hook while the other hand holds and pulls on the line through the eye of the hook.
With the end that is through the eye and the one that you are pulling with your hand, wrap around the hook six or seven times.
Now take the end that you used to wrap around the shaft of the hook and pass it back through the eye. Wet the knot and pull back on the hook eye and you should be all set. Pull back hard and make sure that the knot is tight.
Keep in mind that wearing a good pair of fishing shoes will help when working with strong fish as they offer a strong grip.
Now trim the tip end of the line near the curve of the hook. If, however, you want to add a few more hooks on the line, repeat the process bypassing the lie through the eye of the second hook and using the same method to wrap the line on the shaft of the hook.
Note that you will be passing the line through the back of the hook from here on with each successive new hook. You may need to use a measuring instrument such as a ruler to ensure that the hooks are placed at equal distances from each other.
However, the process is going to be similar to the first hook.
Now it’s time to wear that fishing hat and head out fishing.
Globo Surf Overview
One of the best things any fisherman can learn is how to Snell a Knot. The tight and secure hold on the hook plus the different variations means that you can choose which works best for you and perfect it.