
Nowadays, the majority of fishing rods are manufactured using boron composite, graphite, and fiberglass. When compared to bamboo and cane, the modern materials feature improved resilience. This, however, does not mean that modern saltwater fishing rods don’t break.
If your ice fishing rod breaks, in most instances, buying a new fishing rod may not be necessary. In most cases, a broken fishing rod can be repaired. To make sure you do not throw away a broken fishing rod you can easily repair, we will show you how to repair a fishing rod.
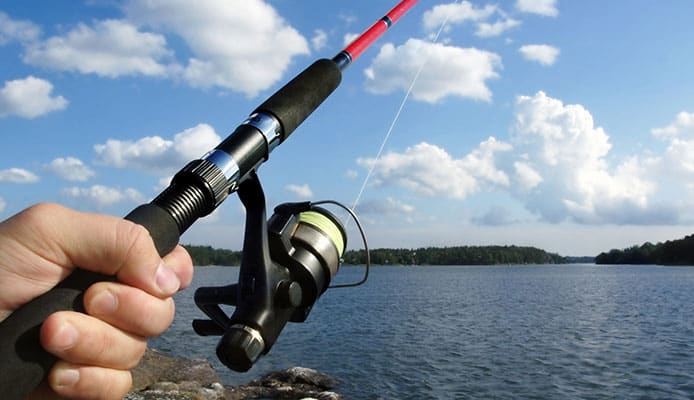
Step by Step Guide on How to Repair Fishing Rod
1. Repairing a Broken Fishing Rod Blank
Inspect the Break
When repairing your broken bass fishing rod, you will need to determine where the break occurred. This step helps you figure out what you are supposed to do next. If you notice that the tip got broken during your saltwater fishing trip, you may need to replace the tip (we will show you how to do this). If the fishing rod features a break somewhere else, you may need to insert a ferrule after cutting out the break.
Trim the Broken Ends
After making sure that the necessary action is not replacing the tip, you will need to cut off the frayed ends of the fishing rod break. The ends are supposed to be trimmed until they become square and neat.
Measure the Diameters
You have to measure and probably record the diameter of each cut piece. These diameters will be necessary when you decide to get a ferrule for your broken fishing rod. Without the diameters, you may end up getting a ferrule that won’t fit.
Glue the Ferrule
The ideal ferrule should feature both a male and a female end. You will need to glue the male end of the ferrule to the end of the fishing rod that features the tip. Next, glue the female ferrule end to the fishing rod end featuring the rod handle. Before proceeding, allow the glue to cure.
If you are in hurry and you are learning how to repair a fishing rod so that you can use the same rod in the next couple of hours, you can use epoxy resin glue that sets in approximately 5 minutes. However, if you are learning how to repair a fishing rod so that you can make your repaired fishing rod as strong as possible, it is a good idea to use a 2-part epoxy that takes more time to cure. This will give you enough time to position your ferrule perfectly.
It is worth noting that the next time you use your topwater lures with a fishing rod that features a ferrule, you may notice some difference. The rod action may be dampened if the ferrule is inserted in the middle of the blank, especially, if your ferrule is made of metal. However, If the break had occurred close to the reel seat or rod guide, the rod’s action may be largely unaffected.
Use Epoxy to Cover the Area Where the Ferrules and the Rod Blank Meet
Aim at creating a sleeve that covers both sides of the ferrules until you can no longer see the damage. Before moving on, allow the glue to cure.
Reduce the Diameter of the Splice
If you do own a lathe designed for fishing rods, you can use it to lathe the splice. The idea is to get as close to the original rod blank diameter as possible.
Chances are, if you are just learning how to repair a fishing rod for the first time, you may not have a fishing rod lathe. If this is the case, you can use fine sandpaper.
Irrespective of whether you use the lathe or sandpaper, you will have to work slowly. If you work too quickly, you may end up bending the rod. This could split your epoxy sleeve.
Wrap the Epoxy Sleeve and the Ferrule Ends
You should ensure that the wrapping matches the one existing around the rod guides. You can coat the wrapping with a polymer or a thin epoxy resin. If your fishing rod did not have any other issue, you can grab your fishing line and go after bass or a different fish species.
Note: If the break was close to the guide, you can move the fishing rod guide over the splice before you wrap the ferrule. To disguise the break further, you can simply add some decorative wrappings somewhere else on the fishing rod.
You might also like: The Ultimate Fishing Rod Buying Guide
2. Fixing the Rod Tip
If after inspecting your fishing rod and reel you determine that only the tip is damaged, you will need to replace the tip. If the rod blank features damage at the tip, you may need to cut through the tip clean and as close to the end as possible. The steps below will show you how to fix a broken rod tip:
Get Rid of the Old Tip
If you did not need to cut the fishing rod to remove the old tip, you may need to apply heat to the glue that holds the tip to the rod. After applying heat, twist the tip gently. If this won’t remove the tip, cutting the rod close to the end of the tip may be the ideal option. Avoid applying too much heat since this could damage the rod tip.
Measure the Rod Tip
To get an ideal replacement, you have to know the measurements for the original tip. You can make use of a tip gauge to determine the size of the tip.
Glue the Replacement Tip
After applying glue to the tip, affix it to the rod and then twist it slowly into position. After making sure that the tip lines up with the other rod guides, your fishing rod should be ready to reel in a catch.
3. Fixing the Rod Guide
If you are learning how to repair a fishing rod so that you can fix your broken fishing rod guide, the steps in this section should be ideal for you.
Determine the Broken Fishing Rod Guide Diameter
You have to make sure that the replacement guide features the same size as your broken guide. If you get a new guide featuring a different size, this may affect your ability to cast the spinning rod negatively.
Remove the Guide
After heating the epoxy that seals the guide wrappings, use a razor blade to cut the wrappings on both sides of the guide. Take the necessary caution to avoid cutting into the fishing rod blank.
Replace the Old Guide
After removing the damaged guide together with the wrappings, you can go ahead and put the new guide in place. Make sure the bottom center of the replacement guide aligns with the bottom centers of the other guides on both sides of the fishing rod.
Secure the New Guide
To secure the guide, you will need to wrap it. Before using the epoxy resin or polymer to seal the wrappings, check the guide once more to make sure that it aligns with the other guides.
Globo Surf Overview
It is not uncommon for both professional and beginning fishermen to return home with a broken fishing rod. Throwing away the broken fishing rod is not always the ideal solution. In some instances, you can repair the fishing rod.
This article shows you how to repair a fishing rod. After following the steps in the article, you should hopefully avoid spending money on a new fishing rod.
Fishing Rods Reviews: