
From gliding over the water and practicing new tricks to a sense of achievement and enjoying sessions with friends, kitesurfing has a lot to offer in the fun department. However, with the board sport being a mixture of many action sports – including skateboarding, paragliding, windsurfing, and surfing – getting started can seem too complicated.
But with a little bit of willpower and some time off your busy schedule, learning how to kiteboarding should be possible. In this kitesurfing for beginners’ guide, we will take you through the tips you need to master to become good at the board sport.
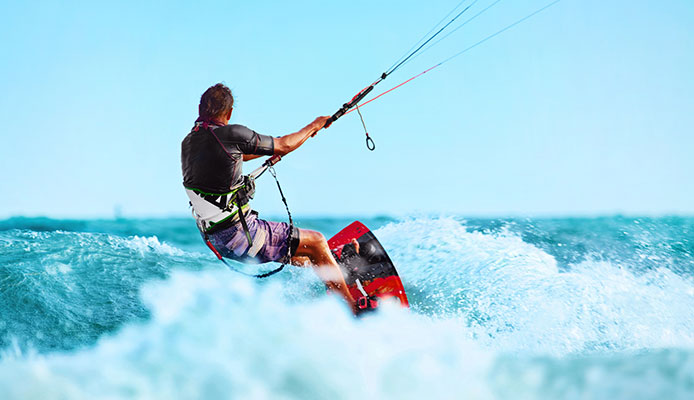
Important Tips for Kitesurfing for Beginners
1. Invest in the Right Kitesurfing Gear
To have a good time on your favorite kitesurfing equipment:
-
Kite and Board
A wind-powered watersport, kitesurfing uses a kite and a board to propel you across the water. This emphasizes the need for the kite and the kitesurfing board.
-
Harness
A harness acts as the direct link between the kitesurfer and the kite. The best harness should offer good back support as well as transfer the kite’s power to the rider’s body. When learning how to kiteboarding, you can use either a seat or waist harness – the choice is largely dependent on your preference.
-
Pump
Kite pumps are essential for pumping up the inflatable kite. The best pumps are durable, having the ability to stand the rigors of kiteboarding.
-
Control Bar
A control bar harnesses the power of the wind and offers steerage. A good control bar will allow you to slow down, jump, turn, and accelerate.
-
Kiteboarding Wear
You will need good board shorts and a rash guard to cover your body. If the water is too cold, you may need a good wetsuit.
To avoid drowning, be sure to put on your favorite life jacket. To protect your head, you may want to invest in a good wakeboard helmet.
2. Understand the Wind Conditions
When it comes to picking the right kite for your session, always listen to your natural body sensors and popular wisdom. Step on the beach as close as possible to the water, put your face in the wind, and then let your brains compare the prevailing wind speed with previous sessions.
If you are a newbie and haven’t done another session in the past, look at what other kitesurfers are pumping and also talk to them. Be sure to adjust for your board, skill level, and weight.
Irrespective of the situation, avoid relying solely on the wind meter. Aside from the meter’s relative accuracy, other riders may already know something you may not know about the day’s conditions, including, thermal effects, storms, and tide.
3. Suit Up and Set Up Your Gear
Especially in situations where the wind is strong, kite pumping should be one of your last steps before getting on the water. The less time the kite spends getting whipped by the hard wind and sand, the longer it will last. Also, reserving kite pumping as the last step reduces the chances of someone’s lines cutting into your kite or getting blown away.
After suiting up, setting up your gear, walk downwind (with your back to the wind) to extend the lines. This will make it much easier to keep the lines from tangling, which often happens in strong winds.
4. Use the Right Line Settings
Many kites feature different knot settings for power adjustment. For example, it is not uncommon to find three-knot positions where the steering lines connect. This setting lets the rider reduce or increase the amount of power in the kite based on the prevailing wind.
This setting lets you avoid being overpowered, especially when you are riding strapless. You can choose a smaller kite and shorten the back lines slightly by just connecting them to the knot that is closest to your kite.
This will pull your trailing edge down a little more and lift the leading edge, opening up the kite to the wind, and giving it the needed power. When practicing kitesurfing for beginners, you must test the settings on the kite before getting on the water.
5. Pump Your Kite Correctly
Kite pumping can be hard on the rider’s back. Hence, to avoid straining yourself, push your hips backward and bend them – avoid bending your spine. Also, brace the lumbar muscles and bend the knees slightly.
Knowing how much pressure is enough can be hard if your pump does not have a built-in pressure gauge. To estimate if you have reached the ideal pressure, simply flick your leading edge and listen to the sound.
The kite should be inflated to keep it from bending, especially if you are a heavier rider. Hence, the flicking sound should, therefore, be relatively high pitched.
6. Close Your Struts
If the leading-edge bladder blows up or leaks while you are far from the shore, the struts will help keep the kite afloat. You might even be able to sail the floating kite back to the beach safely. For this reason, always remember to close the strut valves after pumping your kite.
After closing the strut valves, be sure to check that the front bridles are clear before launching. If you do not realize that the bridles have remained caught until just before launching, you will need to put down the kite to fix it. This can waste too much of your time, as well as that of your launch helper.
7. Stretch Before Launching
More often than not, people who are learning how to kiteboarding forget to do some stretch exercises before launching. Always do some posterior muscle stretches and squats before you run and grab the control bar to hook it to your harness. A good stretch workout helps you avoid back issues later.
8. Get Your Kiteboard Out of the Way
Most beginning kitesurfers often leave their board lying on the sand between their kite and bar before launching. It is not uncommon for the lines to catch the board when launching, which is dangerous.
To avoid making this mistake, you should have half a circle that has the bar at the center and the lines as a completely clear radius. Pick up your kiteboard and position it in the sand upwind from your control bar. That is, when holding the control bar and facing the kite, your kiteboard will be behind you.
If you are using a surfboard, place it downwind just next to the water before launching. This will make things much easier after launching.
9. Ensure the Canopy is Tense Before Launch
While this is taught in most kite schools, a lot of people learning how to kiteboarding tend to ignore it. As you are all set up for launch, check the canopy to ensure that it is tense enough before giving your helper the OK signal.
If the kite is flapping a bit, it means that you need to step upwind further. If you ignore it and have your helper let go anyway, the kite may bounce around at first.
You might also like: Kiteboarding Schools For Beginners
10. Get into the Water
If the wind is strong on the beach, be sure to trim your kite as much as needed to avoid getting dragged or lofted while walking to the water. Conversely, if the wind is weak near and, on the beach, un-trim the kite until you ride out into the stronger wind zone.
When walking into the water, try to place your kite between the 9 and 12 or 3 and 12 o’clock position. In overly crowded kitesurfing spots, you may be forced to keep the kite at the 12-o’clock position to keep it from touching other kites. As soon as you can, lower the kite in the opposite half-window from the kite nearest to you.
As you are about to walk into the water, you may find other kiteboarders riding close to the shore, with some of them getting ready to turn around and ride back out, others getting back out of the lake or sea to enjoy some beach games. Crossing lines with other riders is way too common among people learning to kitesurf for beginners. To avoid this, let other kiteboarders either ride back out or walk-in, with your kite turned inland to avoid getting in their way.
11. Doing Your Waterstart
As you step in the water, with the kite up and one hand grabbing the kiteboard, move the kite lower seaward to generate a pull. With the help of the kite’s low pull, dive through initial waves, and then body drag past the shore break.
If you had trimmed your kite to make walking to the water safer and easier, re-adjust the trim before diving the kite into the power zone. If the wind is close to the shore, remove the trim to have enough power to get up and gain the initial speed. If, on the other hand, the wind is very strong by the beach, trim the kite to avoid faceplanting or being thrown off the kiteboard.
12. Edge in Small Touches
As you ride, whenever you determine a strong gust is coming in, go all out edging the kiteboard as hard as possible, getting ready to release pressure on the board when the gust ends. This should help you take full advantage of the wind boosts and avoid losing your momentum in lulls.
Respond to wind lulls by adjusting your course first, heading a little bit downwind without moving your kite too much. Only work your kite when the wind lull lasts – this will help you create more apparent wind and avoid stalling or your board sinking.
13. Head Downwind When Crossing the Waves
When learning how to kiteboarding, most beginners ride across any incoming waves by smashing into them head-on. In addition to having a high impact on your ligaments and bones, this approach can send you flying unwillingly. Instead, head a bit downwind right before hitting a wave while raising the kite close to the 12-o’clock position to generate an upward pull to help you hop over the whitewater or wave.
14. Dropping the Kite in Sea
If the kite is down out in the ocean because of wind drop, you will need to wait for the wind to come back. Avoid doing anything radical while waiting – for example, rolling up the lines – unless you are sure that the wind is gone completely and is not coming back.
Try to steer the floating kite around you, positioning its lines in an angle that best suits the direction of the wind. However, always be aware of the wind picking up and the kite relaunching without warning – if this happens, the line you are holding and pulling on might cut your hand badly.
15. Allow the Wind to Push You to Shore
If you fail to relaunch the kite, and assuming that the wind is side-on, on-shore, or cross-shore in the bay, avoid panicking and wait for the low wind to push the floating kite toward the beach. Depending on the wind direction and configuration on your beach, it may take several hours to get back on land.
As mentioned, a good wetsuit should protect you from hypothermia. Once you are back on the beach, you can follow the steps mentioned above to launch again.
FAQs
Q: How Do I Start Kitesurfing?
To start kitesurfing, it is recommended that you take lessons from a certified kitesurfing instructor. In addition to equipping you with the necessary basics, the instructor will equip you with safety tips, making your time on the water much easier.
Q: How Long Does It Take to Learn to Kitesurf?
Learning how to kitesurf takes between 6 and 12 hours of focused lessons. The lessons may take more than 12 hours and it very rarely takes less than 6 hours.
Q: How Dangerous is Kitesurfing?
With just 7 injuries per 1,000 hours of physical activity, kitesurfing is a relatively safe sport, especially when you compare it to mainstream sports. American football features 36 injuries per 1,000 hours of activity; even soccer appears more dangerous with up to 19 injuries per 1,000 hours of activity.
Globo Surf Overview
While kiteboarding might appear too complicated to an absolute beginner, things get much easier after taking a few lessons. This kitesurfing for beginners’ guide carries tips you would need to keep in mind to move from a rookie to an experienced kiteboarder. Keep in mind that our guide is not a replacement for kiteboarding lessons – you will still need to work with experienced instructors when getting started.