
For every kayak enthusiast, learning how to stabilize your vessel is one of the skills you’ll find really useful sooner or later. For instance, if you know how to make your kayak stable by installing a kayak outrigger you’ll give yourself a few extra options whether for fun or some other activity where additional stability is required.
This kayak outrigger DIY guide will help you learn how to do it easily and from your home. Also, we’ll answer the questions like what is a kayak outrigger, why do you need it, what could you use it for, and any other information you may find beneficial.
What Is A Kayak Outrigger?
In simple words, a kayak outrigger serves to make your vessel more stable, allowing you to move freely in your kayak without having to worry about losing your balance. In other words, you’ll be able to stand up in your kayak and it will not tip over. Think of a kayak outrigger as training wheels for bikes.
When Could An Outrigger Be Useful?
There are many examples where a kayak outrigger can be helpful. The first one is kayak fishing. If you’ve had problems with keeping your balance while working your kayak fishing rods, a kayak stabilizer DIY solution is the best option. You’ll be able to move along your kayak and focus on the fishing part instead of constant battle with balance.
The second activity you could find kayak outrigger useful is ocean kayaking. Although already stable, sometimes you’ll need additional stability to keep your kayaking session safe. Sea can quickly become rough, this way you’ll have extra help in case the bigger waves catch you on the water.
Many kayak-included fun games require frequent getting into a vessel from water, so additional stability will not only make this easier, but it will also make it safer because it will lower the chance of kayak capsizing and hitting someone.
If you’re a kayaking beginner it may be a great add-on that will let you focus on your paddling technique without a possible capsizing distraction.
And last but not the least, this may be the best option for people who feel good and don’t want to change their vessel, but want to do different things with their kayak. For instance, if you love smaller, narrower, and more maneuverable kayak, but that one will not work for fishing. Instead of buying a new kayak, you may simply add a kayak outrigger and turn your white water kayak into an ocean fishing kayak.
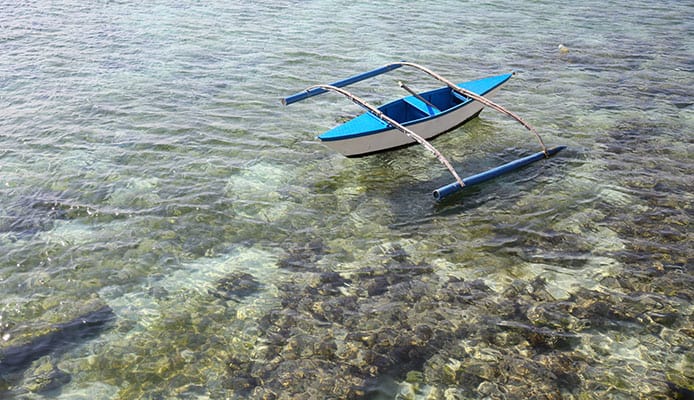
Outrigger Working Explained
Basically, they work as additional floats on both sides of your kayak. Most often, kayak outriggers are cylindrical shaped and attached to poles, and after that added to your kayak sides.
If you own a fishing kayak, sometimes they may be installed near the rear end, so it doesn’t bother you while you move or when you cast.
By providing the extra width to your ship, it is easy to understand that the longer the poles that hold the outriggers are, the bigger the buoyancy will be, and as a result, your kayak will become more stable.
Outrigger Side Effects
Some side effects will come along with the outrigger installation:
Reduced Speed
With bigger width and additional surface that comes in touch with the water, you won’t be able to go as fast as you would without the kayak stabilizer.
Reduced Manoeuvrability
Same as speed, you won’t be able to turn so quickly, but you’ll have more control over your vessel.
Appearance
Kayak may not look so nice and attractive with the outrigger installed.
You might also like:
Whitewater Kayaking Gear Guide For Beginners
Store a Kayak: Simple Solutions and Quick Tips
How To Install Kayak Outrigger – Guide
Installing a kayak outrigger is simple and easy enough if you follow this step by step kayak stabilizer DIY guide.
What Do You Need
To attach a kayak outrigger you’ll need the following:
- 2 floats
- two 1 inch 90 degrees pipes
- two 1 inch 45 degrees pipes
- two ¾ inch PVC pipes
- 1 inch – to – ¾ inch adaptor
- PVC tee pipe connector
- Connecting screws, nuts, and couplings
1. Attaching Pipes
Start by adding coupling to the bottom of the 90-degree pipe, and then follow by adding the second one slightly above the first one. Place that pipe into the rod holder and make sure it is safely and firmly snug inside.
2. Adding The Second Pipe
Now it is time to connect pipes. With a 45-degree pipe added to the end of a 90-degree pipe, you’ll get an adjustable stabilizer you can move to get better stability. When linked and secured, add a PVC tee pipe connector to the end of the 45-degree pipe, and then finish up with gluing 1 inch – to – ¾ inch adaptor that will let you add ¾ inch PVC pipe.
3. Time To Add The Floats
With ¾ inch pipe installed, all you’ll have to do is to simply attach your chosen floats. Most of them have ¾ inch holes so this should not be an issue. Now simply repeat the process on the other side of your vessel and you’ll have your kayak stabilizer done in no time.
Don’t Be Scared To Be Creative
Although the easiest, this may not be the only option for a DIY outrigger. Basically, anything that will keep your kayak stable and improve buoyancy will do the trick. Most of the outriggers include PVC pipes, some can be attached to the mounting point, and if you have an idea of your own that could work, feel free to try it out.
Eventually, you may even do it without the outrigger kit, with your own materials and ideas, or with your own, hand-made floats instead of the ones you can purchase.
Globo Surf Overview
Learning how to install a kayak outrigger is more than useful knowledge, especially if you tend to change between the activities. It is not complicated, doesn’t take much time, and this way you’ll be able to use your vessel basically for every kayak adventure you can think of – from fishing to white water kayaking and ocean kayaking.
More Kayak Accessories Guides:
- How to Strap a Kayak to a Roof Rack – Easy 5 Step Guide!
- How to Transport And Tie A Kayak Without A Roof Rack
- How To Add A Skeg To A Kayak?
- How To Use A Kayak Throw Rope
- A Guide To Kayak Bulkheads
- 11 Steps How to Paint a Kayak & Add Decals
- Do You Need Kayak Paddle Drip Rings?
- Ideas For Kayak Modifications And Upgrades
- Kayaking Checklist: Most Important Kayaking Essentials