Before you have put your new ski bindings to good use, you’ll have to learn how to mount ski bindings and how to adjust ski bindings. It will be a bit complicated at first, but it is important and useful to learn how to do it properly, for your own safety first, and by learning how to do it, you’ll save money you’ll otherwise spend on a certified ski technician.
What Are Ski Bindings?
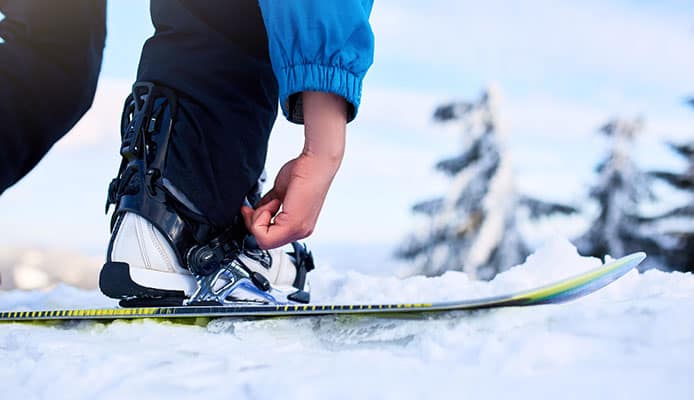
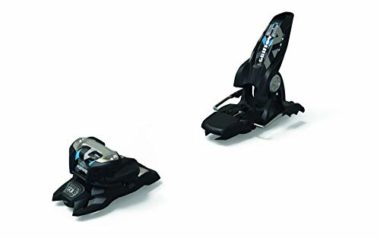
A ski binding is, simply described, a device used to connect your ski boot to the ski. It should serve as a firm ski-boot connection to allow you to change directions and maneuver, while it also serves as a safety measure by releasing the boot in the case the force is too great, this way significantly lowering injury chance.
There are many types of skiing, and each has its own binding type that fits the stress and force typical for that specific type.
What Do You Need?
To mount bindings properly, you’ll need three things – how-to guide, mounting skills, and proper tools.
How-To Guide
Because of its complexity, it is important to know how and when to do a specific activity. By repeating it enough times, you’ll create a routine that will make things way easier. You could write it down or print it and use it as a reminder for the first few times.
Mounting Skills
As you go with step by step mounting, the rest of the needed mounting skills will follow, and once your mind and your hands get enough sense on how to do it, it will be an easy thing to do.
Proper Tools
You could buy tool pieces one by one but to avoid any mistakes, it is smart to go to your ski shop and ask for ski bindings mounting tools for your specific brand and type.
Important – Before You Start, Read The Warranty!
Before you start with the mounting process, carefully read the warranty you’ve got when you bought your bindings. Some manufacturers don’t allow mounting the ski bindings outside of their workshop, and doing so will void the warranty. If you’re not sure about your own skills, in this case, it is maybe best to leave it to the professionals.
Professional Mounting
When buying your new gear – skis, bindings, and boots – you may consider getting them at the same shop, because this way you may get the mounting service for a minimal fee, and sometimes even for free.
Where To Mount
Not every ski shop offers the same mounting quality. Ask around, whether via online reviews or verbal recommendations from other skiers and their experience, and go with the one that has the best reputation. Remember, ski bindings well-mounted will prevent you from getting injured.
Don’t Lie To Technician
At the shop, you’ll be asked a few different questions, and it is important to answer truthfully. If you lie, the toe and heel may not be adjusted well enough for you, so you could end up getting injured.
The information the technician will need is the following:
- Skier’s weight
- Skier’s height
- Skier’s age
- Skier’s gender
- Skill level
- Boot size
- Is the skier aggressive, cautious, or moderate?
Along with this information, you’ll also have to bring a boot, so the technician can fit it properly. You won’t need both of your boots, but you couldn’t bring your friend’s boots, even if they are the same model and size.
When you have finished mounting, look for alignment and make sure it all fits nicely. Check it and if you see a problem, let the technician knows to fix it instantly.
How Long Should It Last?
In simple words, your ski bindings should last at least as long as your skis, if your skis are new and the bindings are freshly mounted. If you’ve bought used ones, you should go and get new bindings. The average ski bindings’ lifespan is between 100 and 120 days of usage.
How To Mount Ski Bindings – DIY Edition

You’ve decided you want to try it out and mount your ski bindings by yourself, so it is a good idea to have a step by step guide that will help you do it properly. Be careful not to miss any step, follow this instruction closely and when you’re done, you will be more than ready to hit the snow.
This is the area you’ll start your every mounting process. This is where the length of the binding can be adjusted along with the front’s pressure. Don’t rush it; it is important to do it properly. To do it, first, take a look at the heel of the boot to find the length of the sole written in millimeters. The millimeter counter should also be at the front side of your skis, and you’ll be able to adjust it by simply setting it to the number you’ve found on your boot.
Now it is time to find the perfect place. Take your ski boot and slowly place it into the binding, with the toe of the boot placed into the front part of the binding, and now you can lock it.
Now it is time to check if the midsole area setting and the forward pressure system setting are right. The midsole area of the boot should match the middle part of the ski, and you’ll check the pressure by looking at the pressure indicator at the backside of the binding. There is a possibility it will be placed on the heel, in which case you may have to adjust a middle until it comes directly over the middle area.
Proper pressure will make your skis bend easier as you ski, helping you make the turns and maneuver more easily and efficiently. Look at the compression control for a small indicator. Take the heel of your binding and move it slightly forward or backward until the mentioned indicator is at the center of the adjustment area.
We’ve already mentioned that ski bindings also serves as a safety measure by releasing your skis from your boots if you fall, and you change the release trigger at the release force setting. To calculate your release force setting, you’ll need to do some math following the so-called DIN scale.
At first, the technician will calibrate your ski bindings, according to your body features. You could adjust it by yourself, but sometimes this voids the warranty. To simplify things, a low DIN setting may lead to your ski being released without the need, while a level too high may lead to your skis staying on even when you have to release them.
DIN Calculator
For a DIN calculator, you’ll need the information provided above – age, weight, height, boot size, skill level, and gender. There are many places online where you could find DIN calculators. Also, you should know that DIN values tend to change over time so you’ll have to readjust them. For instance, your backpack could affect your DIN level, the change in the weight of your clothes, and your own, and you’ll also have to consider the type of snow.
How To Adjust Ski Bindings
Once the installation part of your ski bindings is over, you’ll have to adjust them so they fit your feet and your leg without causing any discomfort.
The change of the DIN level means you’ll have to readjust everything, so you should start with the toe part.
Take the screwdriver and find the screw at the front of your binding. Using the screwdriver, rotate it clockwise until you see the number indicator has reached the DIN number.
Now it is time to get back to the end part of your binding. Remember, there shouldn’t be any loose ends and everything should hold firmly when you check it, without any wiggling room when you try to move the boot. Look at the back-end of the ski boot and check if it is slid into the binding to create a tight fit. Check the pressure indicator, the goal is to place it in the yellow zone. If it is all right, take the screwdriver and repeat the process as you’ve done with the front part – turn it clockwise until it reaches the same number as DIN.
Now it is time to test it all out, so you know you’ve done a good job before you step on the snow. Don’t skip this step as it will show you whether you’ve made some mistake or everything is perfectly fine.
Have your ski pole within a hand reach before you start. Fit the boots into the bindings and enter your ski boots for the test part. Once your boots are on, try to find any loose area, anything that doesn’t feel secure. If you feel like something’s wrong, it’s because most likely it is wrong and you’ll have to start from the beginning. There is a possibility you’ve simply made some smaller error at first so there shouldn’t be a problem for you to fix it.
On the other hand, if everything feels right and firm enough to make you feel secure, then you can be sure you’ve done a good job and won’t have to change a thing.
The final thing you’ll have to test is your brakes. Remember, sometimes you’ll have to stop quickly, so working brakes are an essential part of your safety while you ski, and they have to be placed in their correct position.
Check the back of your ski. While the binding is still open, the rear brake should stay parallel to the ski. Once you close the binding, it will move to the 45-degree angle position. Now take the ski pole and press the ski brake down, which will cause the binding to unlock. What you’re looking for is pressure from the brake. If you feel the resistance as you press the brake, that means they are working, but it is not so simple. Brakes that activate easily or without any resistance could lead to ski binding letting go from your boot too easily so it could happen when you don’t want it, while if there is too much resistance, your ski may not be released when needed.
If there is any kind of difficulty, you may need to recheck your DIN setting.
Don’t Be Shy To Ask For Help
The proper ski binding setup will make the difference between a safe and fun trip on one end, and a potential disaster on the other one. Remember, skis can go really fast, and sometimes it is essential to have the ability to react as quickly as possible to avoid breaking your equipment or getting yourself injured.
To avoid this from occurring, if you don’t feel too confident or if you feel like something is wrong with the way you’ve mounted or adjusted your ski bindings, don’t wait to check it out on the track. It is important to have it ready and working by the time you step on the snow. Most of the ski shops offer the chance to mount your ski bindings for you the way it should be done. Not to mention the fact that many bindings have their warranty voided if you decide to adjust it by yourself instead of letting a certified technician do it.
If you’d love to do it by yourself at any cost, stick to the guidelines, and follow the instructions carefully.
Especially if you’re a skiing newbie and you’re just learning the basics. There are lots of stuff you’ll have to learn, and this is the one you could let someone else take care of.
Globo Surf Overview
Ski bindings are one of the most important parts of ski equipment and proper mounting, and adjusting is a key part of skier safety and should be taken seriously. Learning how to do it is always recommended, but if you’re not sure, leave it to the professionals. They’ll do it for you, so you could relax and enjoy your ride without any concern.
More Snow Reviews:
- Ski Pants
- All Mountain Snowboard
- Heated Gloves
- Beginner Snowboard
- Snowboard Gloves
- Exercises For Skiing
- Types Of Skiing
- Kids Winter Clothes
- Skiing In New Zealand
- Learning Skiing
Source
- How to Adjust Ski Bindings, wikihow.com


