
While you might think that fishing is one of the simplest outdoor activities, the sport has gotten more and more elaborate and technical over the years. Gone are the days when you would simply tie a thread to a stick and wait. Available for you today are all sorts of tools and options designed to make you a better and more efficient fisherman, one that can head out of the door with the confidence of knowing that they will not come back empty-handed.
The best side imaging fish finder is one piece of gear that can significantly increase your chances of catching prey. By allowing you to know where the fish are in the water thanks to the transducer attached to the bottom of the boat, you can plan your strategies much more accurately. Side view fish finders are one of those tools that will make you wonder how you’ve lived without them after you’ve tried them, so join us as we take a look through the best options on the market.
OUR TOP PICK
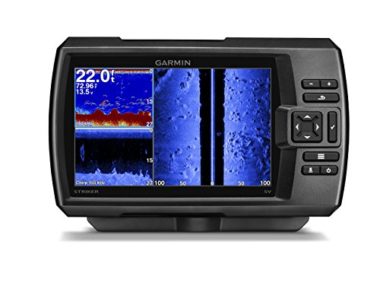
Garmin Striker 7SV
- Stand Out Features - Why We Love It
- CHIRP sonar
- Easy to use interface with buttons
- Water resistant
- Very good GPS and navigation
Dimensions: 23,5 x 14 x 5,8 cm
Sonar frequencies: 50/77/200 kHz
Sonar depths: 2.300 feet, 1.100 feet in salty water
EDITORS CHOICE
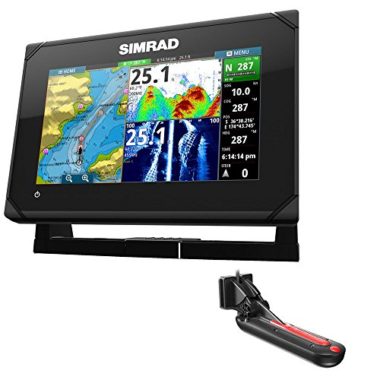
Simrad GO7 XSE
- Stand Out Features - Why We Love It
- Excellent connectivity
- Numerous sonar options such as CHIRP
- Many radar options
- Also works as a chartplotter
Dimensions: 7.56 x 5.55 x 3.26 inches
Display resolution: 800×480 pixels
Internal storage: 90 MB
BEST VALUE
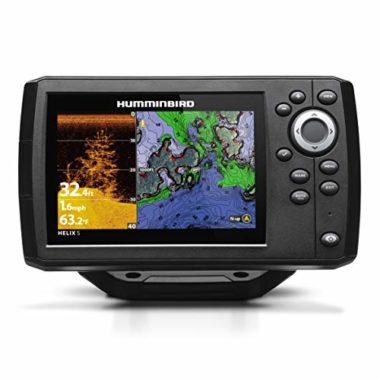
Humminbird
- Stand Out Features - Why We Love It
- Internal GPS for chart plotting
- Big and bright LCD screen
- Excellent sonar features, including CHIRP
- AutoChart Live lets you map fishing spots in real time
Display size: 5″ diagonal
Sonar frequencies supported: 83/200 kHz
Sonar depths: 1.500 feet
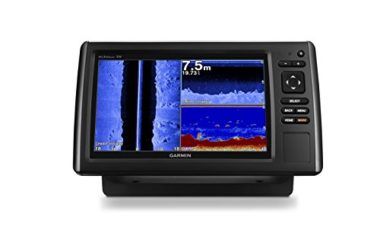
Garmin Echomap Chirp 94SV
- Stand Out Features - Why We Love It
- High-tech sonar
- Easy to mount and unmount
- Available with preloaded charts
- SailAssist features
Display size: 9″ diagonal
Sonar frequencies supported: 50/77/200 kHz
Sonar depths: 2.300 feet at 77 kHz in freshwater, 1.100 feet at 77 kHz in saltwater
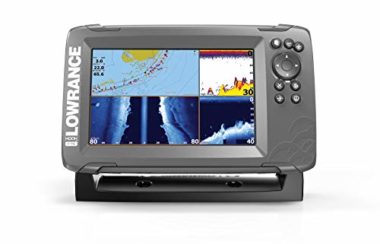
Lowrance HOOK2 7
- Stand Out Features - Why We Love It
- Excellent sonar options with automatic setup
- Preloaded charts for navigation
- Included GPS
- SD card slot allows for further map database expansion
Display size: 5″, 7″, 9″ and 12″ diagonal
Sonar frequencies supported: 50/77/200 kHz
Sonar depths: 2.300 feet at 77 kHz in freshwater, 1.100 feet at 77 kHz in saltwater
How To Choose A Side Imaging Fish Finder – Buying Guide
GPS
The GPS in your fish finder is a feature we would not recommend being without. The ability to pinpoint with precision your position in the water is something that can be a lifesaver in certain situations, and for this reason, the best fish finder with side imaging will not be without one. The GPS also provides valuable assistance in locating recent channels you’ve fished in and navigate back to them whenever you want. All the topography information that can be stored in a map will be close to useless if you’re missing a way to accurately navigate your way through it. Be sure to check if the fish finder of your choice has an integrated GPS, or if it doesn’t, which is uncommon of high-end models, try to find a way to complement this flaw. You might end up regretting it very soon if you do not.
Display Screen
When you’re out fishing for long hours you will likely find yourself under a lot of direct sunlight. This not only means that will need to have with you an excellent pair of sunglasses and abundant suncream but also points out that it might be hard to see on your screen if it is not bright enough. Regardless of the size, which mostly depends on your personal preference, convenience or the shape of your control deck, brightness is a feature you should pay special attention to. The best fish finder with side imaging is the one whose screen will be visible in every situation, so look for one whose brightness can go up to at least 1500 nits or even above. Another thing to consider is screen resolution. Being able to identify small details on the seafloor may well make the difference between a successful catch and a miss, so you need your screen to be not only bright but also well defined. 800 pixels of resolution on the horizontal axis is usually enough to give you a clear enough view, but anything you can find that goes higher is even better.
System Flexibility
Customizability is often what makes the difference between an entry-level and a premium product. In the case of a depth finder with side imaging, this translates into being able to choose the way information is displayed on the screen. This can affect both its placement and the color of the data. Fishing may seem like a slow sport, but in the crucial moment, you don’t want anything to be distracting you from hunting down your prey. Being able to adjust the contrast and visibility of your screen is something that can become very handy when you least expect it, and can very well make the difference between a successful hunt or a disappointed fisherman.
Wireless Device Compatibility
The best and most advanced fish finders not only provide valuable information on their screens, but they are also able to send it wirelessly to your devices. This way, you’ll not only be able to monitor the data wherever you find yourself on the boat, but you can also remotely control the fish finder so you don’t have to move at what might be a particularly important moment. Sonar images and maps can all be readily available on your device with the push of a button, allowing you much greater freedom of movement so you can be wherever you need to be and still keep everything under control. Most fish finders are compatible both with the iOS and the Android systems, just be careful and double-check before you hit buy or you risk missing out on an exciting and unique feature.
Installation
Checking the installation process of your fish finder is something we warmly recommend doing even before you buy one. If it’s too complicated it might even discourage you from going out altogether, potentially ruining an otherwise perfect fishing trip. Much will also depend on the space and connections you have on your boat, so be sure to carefully peruse the manuals, most of which are available online, before you hit that button. If you’re renting a boat, then look for a fish finder that is easy, quick and versatile to install since you’re going to have to mount it on a variety of different boats and you don’t want the process to slow you down enormously.
Use
If it’s the first time you are using a side imaging fish scanner, make sure you understand what you are seeing before you start trying to customize the experience. Drive by some visible objects or recognizable features so you can see how they show up on the screen while leaving all the settings at default, and only then you should proceed to adjust contrast, sensitivity and color to fit your personal preference. Once you feel comfortable with the system, one particular feature that is important to set right is the “white level”, that is the brightness ration between light and dark colors. This will help you in making out fish that are swimming in front of background objects. The scrolling speed also needs to be tweaked to more or less match the speed at which you are moving through the water, to obtain sharp and high quality images. A good starting point is setting it at 5 when moving along between 3 and 5 mph. Sonar range will determine how far from the boat you can see, and in this case, a compromise needs to be struck between detail and distance, since a range that is too wide won’t let you see smaller items. Other viewing options you can decide to change are the contour mode, which can let you have an aerial view of the bottom instead of two columns on the right and left of the screen, and the color palette. Depending on whether you are fishing in salt water, fresh water, or from a kayak or a boat, you will need to customize your settings to match the characteristics of the environment you find yourself in.
Transducer
The transducer is the most important part of any fish finder since it is the physical origin point of the sonar waves that let you discover what lies beneath you. The installation of the transducer is a particularly delicate step in the setting up of a fish finder since you need to make sure that is has a clear and unimpeded view all around it. Several options are available, depending on the jackplate. The first one implies drilling holes directly into the hull of the boat to place the brackets, so it is crucial to get it right the first time. You can also decide to install the transducer under or on the side of the jackplate or, if your boat has one, one the step that is underneath the motor or above the pad. Some users choose to install the transducer on the trolling motor, which can be useful while cruising at slow speeds.
You might also like: Perfect Fish Finders Under $200
Frequency
The frequency you select for your sonar to operate at will depend on the conditions you are fishing in. Shallow waters will require a higher frequency than deeper waters, and this is why most side imaging fish finders will let you switch between different frequencies. Lower value frequencies provide greater coverage, as they can spread out the signal over a much wider area. The higher frequencies need to be focused on a smaller area, because the transducer can only output a limited amount of power, but will deliver the greatest wealth of details.
Coverage
Coverage is an area where side imaging fish finders really stand out. Regular sonars are only able to peruse a cone whose width usually stay between 20 and 60 degrees. Side imaging ones, on the other hand, are able to give you a panorama view of 180 degrees on all sides, providing you with a much more complete view of your surroundings. The latest available technologies, such as CHIRP, allow finders to do this all the while maintaining an excellent level of detail, making side imaging fish finders the only real option for serious fishermen.
Accuracy
Another topic which will convince you to switch to side imaging finders, if you haven’t changed your mind yet, is accuracy. Older sonar models made it very hard to identify small details and it was often impossible to distinguish a fish that was floating in front of a clump of weeds or other bottom feature. Side imaging fish finders now make it possible to explore the seafloor in a way that was unthinkable in the past, and customizing their displays makes it accessible to all users. Many of them even feature a click and zoom option which lets you explore a particular spot in great detail.
FAQs
Q: Does Side Scan Show Fish?
Yes, a side scanner will show you fish swimming around and will even let you identify what kind of fish you are looking at. This will allow you to choose how to place your bait or decide which strategy to apply in the best way possible, so you can maximize your chances of success.
Q: What Is The Difference Between A Fish Finder And A Depth Finder?
Both of these devices use sonar, but they are designed for different uses. A fish finder, as the name suggests, is aimed at fishermen who want to have information about the structure of the seafloor beneath them and the position of fish in the water. A depth finder's main job is to tell you how deep is the water you are moving on and sometimes even does away with a graphic display. This tool is more useful for divers and sailors.
Q: How To Use A Side Image Fish Finder?
Once installed and with a well placed transducer, a side imaging fish finder will provide you with a clear image of the sea bottom, usually divided into two parts. Once you learn to read it and interpret the information it provides, you will be able to devise a strategy to maximize the chances of catching fish, thanks to the knowledge you will have of their position and the sea floor features.
Globo Surf Overview
Fishermen are usually passionate about gear, and some of it can have a significant impact on the success of your trips on the water. In our side imaging fish finder reviews we have given you an overview of the options available on the market. Choose wisely and you’ll be taking your fishing to the next level in no time.