
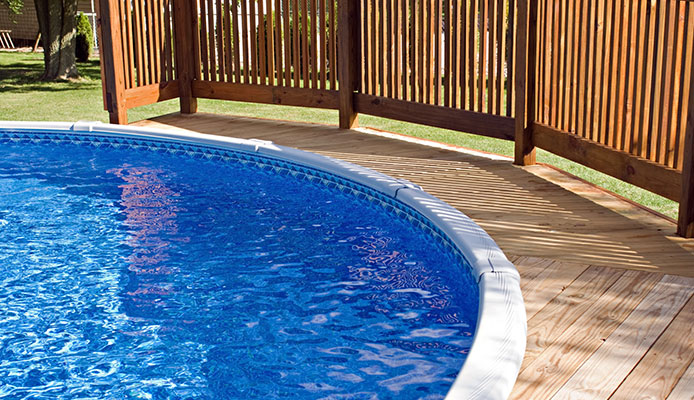
An above-ground pool liner installation and replacement can easily cost your several hundred dollars, perhaps more depending on factors like cost of labor and materials. So if you want to save some money, why not try to learn how to install above ground pool liner and do the task yourself? It won’t be easy but the satisfaction you’ll get and the amount of money you save will make it worth your while. So whether you’re planning on doing an above ground pool liner replacement or are installing a pool liner on a brand new above ground pool, we’ve outlined the steps on how to install or how to replace above ground pool liner below.
6 Steps of Above Ground Pool Liner Installation
Setting up the liner is one of the most crucial aspects of installing an above ground pool. Do it incorrectly and your pool will be leaking water in no time. So to help you prevent that from happening, here are the steps on how to install above ground pool liner.
1. Preparing the Pool Floor
Preparing the pool floor is crucial since the liner is the most delicate part of your above ground swimming pool. You want to make sure that the ground is clear of anything that could puncture it. The necessary preparations and above ground pool leveling solutions to apply will depend on the type of floor you have.
Sand floors are pretty easy to prepare. You simply have to smoothen and level the surface by knocking down high areas and filling in low ones. Also, check the sand cove and build it up if necessary. The cove is a wedge of sand that supports the liner and prevents it from slipping under the pool wall. It also provides a protective barrier that protects the liner from damages that the metal frame of the pool may cause it.
If you have a concrete floor you need to sweep it clean and remove any grit or pebble. You also need to patch any cracked or sunken areas. Even then, concrete floors still tend to be rough so consider installing a commercial pad or solid foam pad over it before installing the pool liner. Aside from protecting your liner from the rough concrete surface, it also gives your pool floor a soft and cushiony feel.
2. Wall Preparation
Check the metal frames for any signs of rust and corrosion. If you see any scrape, sand, and paint over them using a rust conversion paint. Cover all the bolt holes and bolt heads with duct tape so that they don’t come in direct contact with the pool liner.
3. Check the Weather
An above-ground pool liner installation is best done during warm weather. The heat from the sun will warm up the vinyl pool liner, making it more pliable and easier to stretch; hence, much easier to work with. Ideally, there should be clear skies with calm winds and no sign of rain. If the weather forecast reports stormy or cold weather, it would be best to postpone the installation until the weather clears.
4. Installing the Pool Liner
Carry the liner to the middle of the pool. Using a utility knife, open the box very carefully so you don’t cut or damage the pool liner. Then, take the pool liner out of the box and lay it in on the ground, and remove the box from the pool.
With the middle of the pool as your starting point, unfold or unroll the liner outwards or towards the pool walls. As you do, check the liner for holes or tears or any other signs of damage.
Once you’ve reached the pool walls, lift the liner above and over the walls. It would help to have a friend or family come and reach for the pool liner and pull it over the pool walls. Continue doing so until the edges of the pool liner are all draped over the pool walls. You can use clothespins or coping strips to temporarily hold the liner in place.
5. Smoothen the Pool Liner
Since pool liners are designed with extra material to compensate for shrinking, it is normal for wrinkling to occur. To smoothen out the liner, run your hands along with the wrinkled areas as you push the liner towards the pool walls.
You can also use a vacuum to remove the air between the pool liner and the pool floor and walls. Insert the vacuum hose through the skimmer hole behind the pool liner. Then turn on the vacuum and carefully adjust the pool liner as the vacuum sucks the air between the pool liner and the pool floor and walls.
6. Fill the Pool with Water
Fill the pool with water up to an inch high. Check if the water is level, if not it will run or accumulate to one side only. If so, pull off the liner and adjust the sand floor or commercial padding. Continue making adjustments until you’re satisfied with the water levelness. Then you can fix the pool liner in place according to the manufacturer’s instructions.
7 Steps of Replacing an Old Liner
Even the best above ground pool liners will incur some form of damage over time and will need to be replaced with a new one. If you’re going to do your above ground pool liner replacement yourself, here are the steps regarding how to replace above ground pool liner.
1. Drain the Pool
The first task is how to replace the above ground pool liner would be to drain the water out of your pool. If your above ground pool has a main drain, simply connect a hose to it and open the plug to drain the pool. Otherwise, you’re going to need a pump to remove the water from your pool. In any case, be sure to direct the hose to a drainage system to avoid flooding your yard.
For most pool owners with large above ground pools, this is the part that takes most of the time in an above ground pool liner replacement project so you may want to do other things like cleaning up the yard while waiting. There are also some things you can do to help you drain your above ground pool faster.
2. Remove the Old Pool Liner
After draining the pool, use a utility knife to cut up the old pool liner. Cutting them up in sections will also make it much easier for you to roll and dispose of it later on.
For overlap pool liners, you’re going to need to remove the top rails to release the pool liner from the walls. When doing so, be sure to take note of all pool hardware that you removed. Place screws and bolts and in a small Ziploc bag, label them, and store them in a safe place to avoid losing them. Check the coping strips as well since they tend to become brittle with age. More often than not, you’re going to need to replace the coping strips whenever you change your pool liner.
3. Inspect the Pool Floor, Cove, and Walls
When you’re done removing the old pool liner, go over the pool floors and walls and fix whatever problem there may be.
For the pool floor, check the surface for levelness and smoothness. If you have a sand pool floor, you simply need to smoothen the surface by removing sand from waves and high areas and add sand to deep areas or holes. If you have a concrete floor, smoothen the surface by removing pebbles or pieces of concrete that can puncture the pool liner. Remember, the pool liner is very delicate so you’ll want to make sure that the floor is as smooth as possible. Consider using a commercial padding or solid foam padding if you think the concrete surface is too rough.
As for the pool walls, check for signs of rust and corrosion. If you see any, clean them up and paint them over.
You should also check the cove, a bevel of sand that keeps the liner from making direct contact with the rusty lower parts of the above ground pool frames. More often than not, you’re going to need to build up the cove again before installing the new pool liner.
4. Install New Pool Liner
Before you get started, make sure to check the weather forecast first. As mentioned earlier, the ideal weather conditions when installing a new pool liner would be warm and sunny. If there’s any chance of rain or if the weather is just too cold, consider doing the installation on another day. If the weather permits, you can go ahead with the installation.
To install a new pool liner, bring the pool liner to the middle of the pool then start unrolling or unfolding it outwards or towards the pool walls. Be careful while doing so since the liner is very delicate. Use gentle pushing and pulling motions while spreading the liner. Avoid dragging it over the pool floor at any cost.
Once the pool liner has reached the walls, bring the edges over and above the walls. Have someone on the outside of the pool pull the liner and hold it in place with using coping strips.
5. Set the Liner with a Vacuum
Setting the pool liner using a vacuum can help a lot in removing the wrinkles caused by the air trapped between the liner and the pool floor and walls. You can use a wet/dry vacuum for this process.
First, you’ll want to put the vacuum hose through the pool skimmer and seal up the edges using some cardboard and duct tape. Do the same for other openings on the pool. Then, turn on the vacuum so it can start siphoning the air.
You’ll immediately notice that the liner will start to stick to the walls as the air is removed. At this point, you’ll want to smoothen out any wrinkles with your hands. If you see large wrinkles, turn the vacuum off then go back into the pool and push the trapped air towards the pool wall.
Once all the wrinkles have been smoothed out, you can re-assemble the tops rails.
6. Fill the Pool with Water
Fill the pool with at least six inches of water to let the bottom settle a little on the pool floor and stretch out the liner’s walls. Doing so will stretch the pool liner a little and smoothen out any remaining wrinkles in the pool liner. Keep the vacuum running while filling the pool.
Once the pool liner has settled on the pool floor, go along the pool walls and re-adjust the coping strips one at a time to release tension from the liner walls which can overstretch them.
Once everything is set, continue filling the pool with water. When it’s filled, you can then start re-installing the faceplates and other items you removed before installing the new pool liner, which will most likely be the final part of how to replace the above ground pool liner.
FAQ
Q: How much does it cost to install an above ground pool liner?
The typical cost for an above ground pool liner installation ranges from $200 to $800. However, the price can go higher depending on several factors like the fees and charges of the contractor or installer. If you want to save on the installation, you can learn how to install above ground pool liner and do the installation yourself.
Q: How do you install an above ground pool liner without wrinkles?
Using a heavy duty wet/dry vacuum can help to smoothen out wrinkles in an above ground pool liner during installation. Most wrinkles are generally caused by pockets of air trapped between the pool liner and the pool floor and walls. By suctioning the air out the liner will be able to settle and attach itself to the pool’s structure.
Q: How long does it take to install above ground pool liner?
Installing an above ground pool liner can take anywhere between a day or two, depending on factors like the size of the pool, how fast your contractor will be working, and others. If you are replacing an old above ground pool liner, it may take another day for draining the pool water and removing the old pool liner.
Q: Can I install a pool liner yourself?
Yes, you can install a pool liner yourself and save hundreds of dollars in the process. Just make sure that you buy the right pool liner and do your research on how to install above ground pool liner before you jump into work.
Q: How many years does above ground pool last?
A typical above ground pool will last anywhere between 7 to 15 years. The huge gap is due to varying conditions that the pool is exposed to. With proper above ground pool care and maintenance you can enjoy using your above ground pool for well over a decade.
Q: Is a thicker pool liner better?
Thicker vinyl pool liners have several advantages over their thinner counterparts. For one, they are more resistant against punctures and tears. Since they’re made with more resins and plasticizers, they are capable of withstanding harsh water conditions and exposure to ultraviolet rays from the sun. All in all, thicker vinyl pool liners have a longer service life.
Q: How do you know when you need a new pool liner?
Ideally, an above ground pool liner replacement should be conducted every three to seven years, which is considered the average lifespan of an above ground pool liner. However, signs of damage like holes, tears, or even a fading liner color means you’ll need to replace your pool liner soon.
Q: How warm does it need to be to install an above ground pool liner?
The ideal temperature when installing an above ground pool liner is from 50 degrees to 80 degrees Fahrenheit. Installations one very hot days can cause the vinyl liner to expand excessively, whereas installations during very cold days can cause it to shrink or constrict.
Q: How do you put a liner on an above ground pool with a shop vac?
To put a liner on an above ground pool with a shop vac, follow the steps below:
- Drain your above ground swimming pool by opening the main drain plug or by using a pump.
- Remove the old liner using a sharp utility knife.
- Fix and level the cove, walls, and padding or floor. Remove any debris that can puncture or damage the underside of the pool liner.
- Bring the pool liner into the middle of the pool. Carefully stretch the pool liner outwards or towards the walls, smoothing out large wrinkles as you go along.
- When the edges have reached the pool walls, pull the walls of the liner above and over the pool walls. Attach the pool liner using pool copings.
- Insert the from the shop vac through the return hole on the pool wall. Angle the hose downward so that it sucks the air from the bottom first.
- Fill the pool liner with several inches of water and smooth out any wrinkles in the liner.
- Turn on the shop vac to remove the air between the pool liner and the pool floors and walls. Once the liner has attached itself to the pool structure, you can turn off the shop vac and proceed to fill the pool with water.
Globo Surf Overview
An above-ground pool liner installation or replacement project can be tedious and challenging, but it is manageable if you follow the steps and tips above on how to install above ground pool liner and how to replace above ground pool liner. By doing your own above ground pool liner replacement and installation, you can save hundreds of dollars which you can then use for other projects like beautifying your yard or buying accessories for your above ground pool.