
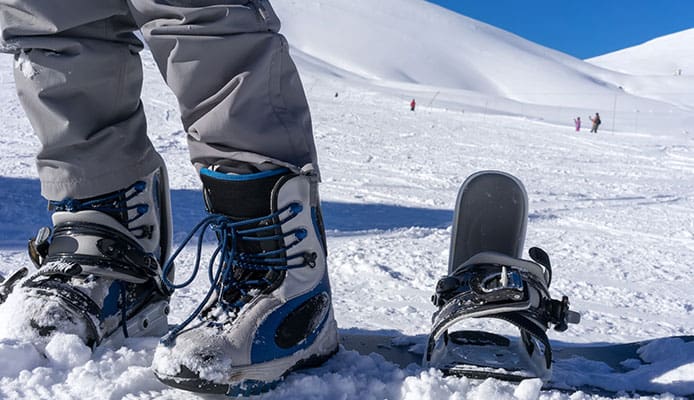
Bindings are one of the most crucial parts of your all-mountain skis. They provide a way for ski boots to clip into their ideal place, ensuring that the wearer is secured to the cross-country skis. Ski bindings are usually personalized to the skier, sized to fit the ski boot he/she invests in, and usually adjusted based on the skier’s weight.
If you intend to recycle your old skis, give them away, or maybe replace your old bindings, you need to know how to remove ski bindings. In this ski bindings removal guide, we will take you through the steps you need to follow to remove the ski bindings.
Ski Bindings Removal Tools
Ski bindings removal does not require a lot of tools. There is a high likelihood that you already own the necessary tools. In addition to the skis from which you would like to remove the bindings, you will need the following tools:
- 2 flathead screwdrivers
- Phillips head screwdriver
- Soldering gun
- Impact wrench (optional)
- New ski bindings featuring new screws (if you want to replace the old ski bindings)
Note: If you are yet to invest in the above tools, you do not have to worry. You can always borrow the tools from your friends.
Step by Step Guide on How to Remove Ski Bindings
1. Find the Bindings and Then Remove the Cover
Find an open space and flip the skis to the ground. This should allow you to see the base of the ski bindings. Check the rear part of the bindings – this should be available towards the back of the skis. You should see a cover attached to the top of the bindings. The cover helps ensure that the binding’s screws stay in place.
Although the cover may appear as if it is screwed in, the filler covers are generally just pushed into the binding opening. You can pry them out with one of your flathead screwdrivers. After removing the filler covers, detach the back cover and place it aside.
2. Remove the Back Part of the Ski Bindings
After removing the cover from the back part of the bindings, the screws keeping the bindings in place should be visible. Grab your Phillips screwdriver and use it to remove the screws. After removing all the screws, go ahead and remove the back portion of the bindings carefully.
Note: The screws can get lost quite easily. Have a bowl ready where you can keep them. Working in an open area can also help ensure that your screws do not end up rolling under items/things.
3. Remove the Front Part of the Ski Bindings
Compared to removing the back portion, removing the front portion is a little bit complicated. To get rid of the front part, you will first need to pry into where your boot fasteners attach to the bindings. For the prying, you can use one of your flathead screwdrivers.
You should have the ability to unlock the mechanism for fastening the boots by now. This should give you access to the binding cover present beneath the mechanism. Use the second flathead screwdriver to pry up on the filler cover available on the front of the ski binding. Remove the front part the same way you removed the back portion.
4. Take Off the Whole Binding
This is the last step in this how-to remove ski bindings guide. For this step, you will need to locate the screws available in the middle section of the ski bindings. Also, locate the screws present in the front section. Grab your Phillips screwdriver and then use it to remove the screws and pull both sections of the skis.
Dealing with the Epoxy or Glue
If you determine that the screws are hard to remove, there is a high likelihood that epoxy or glue had been used during the installation process. Glue is usually used to help seal out the water. It also ensures that the screws do not vibrate and end up getting loose. There are 2 ways to deal with the glue or epoxy:
Use a Wrench Featuring a Posi-Drive Bit
This method should work. However, very few of the people who own ski helmets and ski pants own the impact wrench.
If you do own an impact wrench, you can try twisting it while smacking the regular posi-drive screwdriver with a hammer. It is important to note that when not done properly, this act has the potential to damage the screwdriver handle.
Use a Soldering Gun
Compared to the impact wrench, a soldering gun will help you achieve the results you are looking for more easily and more quickly. Hold the soldering iron tip to the screws for approximately 30 seconds. This should loosen the glue enough, allowing you to remove them pretty easily.
You might also like: Best Kids Ski Goggles
5. Mount the New Bindings
If the goal of removing the ski bindings was to replace them with new ones, you should be ready to install the new bindings at this point. Most ski gear will come with instructions on how to use it. You can always follow the instructions present on your ski bindings.
If you cannot find ideal instructions, you can check out our article on how to mount and adjust ski bindings. If you are just getting started with skiing, following the instructions may not be easy. In this case, working with a professional or someone more experienced may help make things easier for you.
Globo Surf Overview
Ski bindings removal is not as complicated as you might think. If you have the right tools and the right instructions, you should be able to remove the ski bindings within just a couple of minutes.
One thing that can make bindings removal hard is the presence of epoxy or glue in the screws. If you find yourself struggling to remove the screws, do not assume that you are not using enough strength. Instead, use heat to weaken the glue before using your screwdriver again.
More Snow Ski Gear Guides:
- DIN Calculator: Guide On How To Calculate DIN Setting For Ski Bindings
- Do You Really Need Ski Goggles
- Ski vs Snowboard Clothing Guide
- How To Layer For Skiing
- How To Choose Ski and Snowboard Goggles
- How To Size Ski Poles